The Holden VE Series vehicles require the complete side structure of the vehicle to be replaced under certain impact and damage conditions. To the average consumer this may be a worrying position to be in, thinking about what is being done to your car, is it going to be safe and so on. This story follows the process, outlined by Holden, for complete unitary side panel replacement on the Holden VE series vehicles. The complete side panel comes as an assembly and must be installed onto the vehicle as a complete assembly. Holden have very specific rules about what can be repaired, when to replace and what replacement method is required. If the damage to the vehicle meets Holdens requirement to replace the complete side panel, following Holdens replacement procedure ensure the integrity, safety and OEM specification are maintained. Other repair methods are available if the damage does not meet criteria for complete side panel replacement but this story will focus on the process of replacing the Complete Side Panel or Uniside Side Panel replacement to meet Holden factory specifications. Completing this repair procedure without following Holdens replacement guidelines will deem the vehicle unsafe for use. If you are unsure if your vehicle has had this repair method completed correctly or indeed if this repair method should have been completed and wasn't, we suggest you have the vehicle fully inspected for safety and structural integrity.
**Please Note** The side repair process for the Holden VE Utility now includes an Outer Panel Replacement method using Holdens own repair kit. This method is only suitable for certain damage and was not available or approved when the vehicle in this story was repaired.
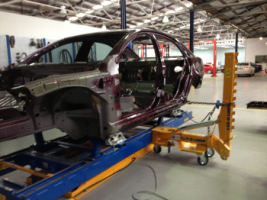
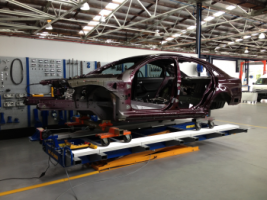
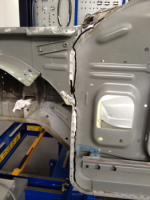
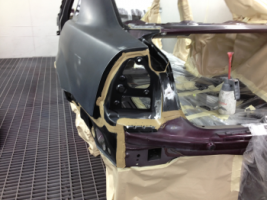
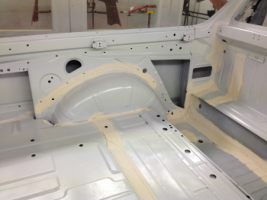
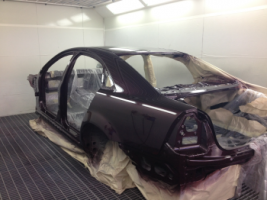
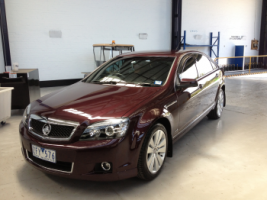
Step 1: Introduction

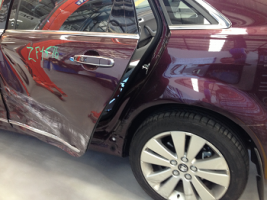
Holdens guidelines specify when a complete side panel replacement is required and when other repair methods can be used. Although the images show what may appear as relatively minor damage, these vehicles require complete side panel replacement in accordance with Holdens guidelines. Holdens reasoning behind this repair method mentions certain structural panels are made from special metals that are not suited to cutting and joining types off repair methods and the application of OEM foam sealers can't be replicated. The Holden Utility repair procedure specifies damage to factory applied sealers, in this area, from heat/welding or impact/repair may result in exhaust gases entering the cabin whilst driving so a complete panel that contains factory applied foam sealers must be used.
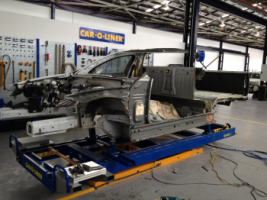
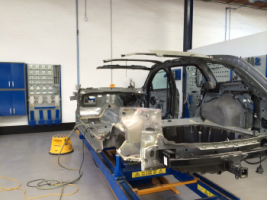
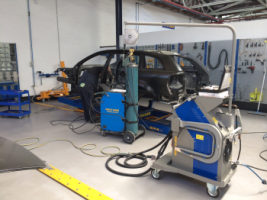
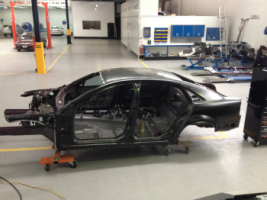
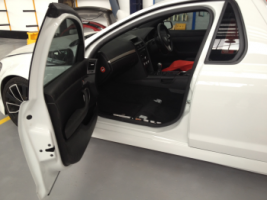
Step 2: Disassembly & Preparation
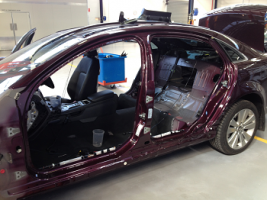
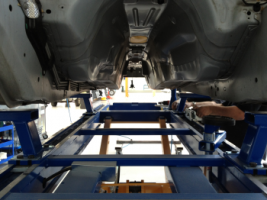
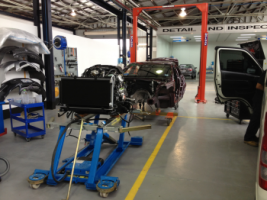
The replacement process is a major structural repair that requires access to a large area of the vehicle body. It is very important to follow Holdens disassembly process even if it appears excessive. Disassembly includes the complete drive-train and engine to remove any excess weight loaded on the structurally weakened body that has the side panel is removed. The weight of the engine and drive train components may cause the body to flex and bend once the complete side panel is removed resulting in an irreparable vehicle. It is not acceptable to use vehicle stands in an attempt to support the engine/drive train weight during the procedure.
This is not industry propaganda, if disassembly is not completed fully or correctly there is a very real risk of compromising the repair process and potentially damaging the vehicle body beyond repair by mistake.
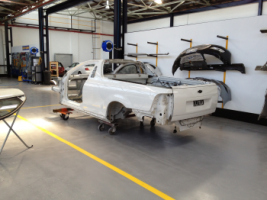
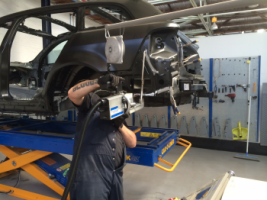
Step 3: Squaring Up
Once the vehicle has been stripped and prepared for repair the technician will further assess the damage. They check the inside and outside of the vehicle body to determine if any damage exist on body components that are not being replaced. Using electronic measuring equipment they measure the body to determine if it meets OEM measurement specification. When the body requires alignment the technician will use hydraulic aligning equipment to straighten the body and bring it back to OEM specification.
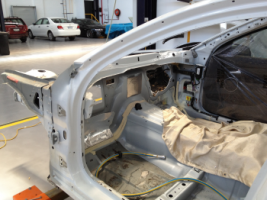
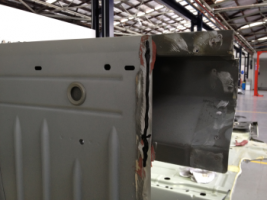
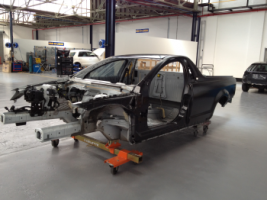
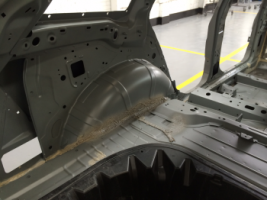
Step 4: Removing the Structural body components.
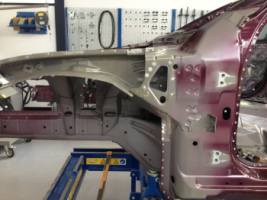
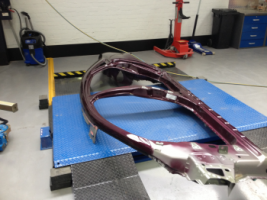
Now that the body is square the old Uniside Panel & associated panels can be removed. As part of Holdens repair procedure, additional panels including the turret (roof) skin and several other bracing parts must be removed and replaced with new. The technician carefully inspects the new UniSide Panel to determine where the OEM welded joins are located on the damaged vehicle. Using special equipment they will remove all of the welds holding the damaged Uniside panel to the vehicle. This step is often done in several sections as the technician clears sections to allow access to hard to reach welds.
Step 5: Aligning the replacement Uniside part
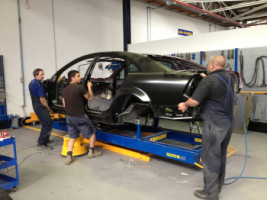
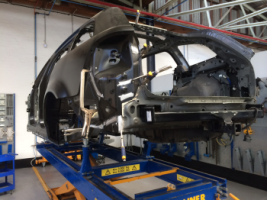
With the help of several assistants the technician will trial fit the replacement part on to the vehicle. The objective here is to make sure the part and body fit together correctly and successfully. The technician can also take appropriate body measurement to meet OEM specification prior to final fitment and welding. At this stage alignment marks are added to assist in the final refitting of the replacement part prior to welding. There maybe several trial fitments prior to moving forward with the process.
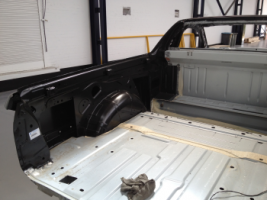
Step 6: Preparing for the replacement Uniside Panel
The process of removing the welded panels often leaves the matting surface requiring minor clean up work. The technician will straighten edges and lightly grind the matting surface on both the vehicle and also the new Uniside part. For successful welding, both matting surfaces of the vehicle body and the new uniside part must be cleaned back to bare metal. On the inner matting surfaces the technician will apply an appropriate weld through primer/protective coating to prevent oxidisation issues in the future. On certain surfaces Holden also specifies the use of a special Structural Adhesive be applied in conjunction with welding.
Step 7: Welding.
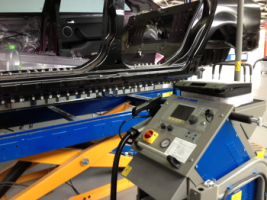
The whole repair process can only be successful if the welding is carried out to OEM specification. The use of Inverter Spot Welding, MIG Welding & Silica Bronze Welding is required to complete the welding process and must be carried out in accordance with Holden welding specifications. Spot Welding equipment must be capable of Auto Calibrating to the metal being welded. With Holden VE series vehicles the Spot welder must be suitable for use with the special high strength steels or the whole repair and integrity of the vehicle will be compromised. The technician will make their way around the replacement part and replicate Holdens OEM welding process. Welds are placed at specified intervals and in a specified order. To ensure the integrity of the repair we use a Car-O-Liner CTR12000 Spot Welder when welding large structural replacement parts.
Step 8: Final clean up and inspection.
Once the technician has completed the welding they are almost finished their part of the process. The whole process of replacing a uniside panel consists of a very clean (but very large) job. There are no body fillers or cutting & joining to finalise the procedure. The only joining is located at the factory OEM welding locations that are simply protected with seam sealer in the factory. The technician will check all of the welding for consistency and completeness making sure all welding steps are finished
Step 9: Preparation for Paint
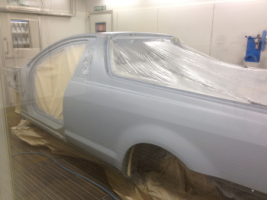
The new replacement Uniside panel arrives to our workshop in Holdens eCoat, a special form of metal primer. The paint technicians will sand and prepare the replacement uniside panel and associated parts for paint. The will pay particular attention to welding areas where the eCoat has been removed. Once the sanding is complete they move on the replicating the OEM seam sealers. Some seam sealers are sprayed on to the surface and others a brushed to match OEM. The seam sealers product is often coloured the same a OEM too.
Step 10: Painting
Painting is usually completed in 2 steps. By completing the painting process in 2 steps allows the paint technicians to tune the technique an methods to match the required finish. Also it can be difficult for the paint technician to move around such a large area of 'wet paint' without unintentionally causing imperfections.
Inner Panels:
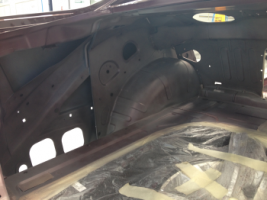
Usually the inside & underbody of the vehicle body are painted first and allowed to dry before painting the outside. Painting the inner parts may appear easy because the location is not seen but it is actually quite complex. The colour and gloss of the finish can be difficult to replicate the OEM process. The paint technicians will carefully apply several colours and types of paint to match the application and coverage of the OEM process. The OEM paint finish on the inner areas is not fully covered with colour and often looks patchy and unfinished. Our paint technicians take the time to replicate a matching finish.
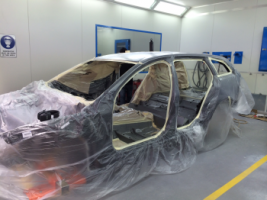
Outer Panels:
Once the inner areas of the body have fully dried the paint technicians move on to the outer areas. This includes all the areas that are visible when the vehicle is fully assembled. With the outer areas prepared for paint the paint technician takes the time to carefully clean and inspect the surface to ensure a perfect finish. The vehicle is masked to stop paint from going on to unwanted areas and moved into a spray painting oven. Using Personal Protective Equipment like air-fed breathing masks and 'spray suits' the paint technician systematically applies several coats of colour base coat to the job. They will pay careful attention to new parts of repaired parts to make sure there is adequate paint coverage. During this process they also blend the paint colour into the existing vehicle colour. The paint technician then inspects the final colour application for consistency and allows the colour to fully dry. The next step is to apply a protective clear coat to the whole job. Several coats are applied with meticulous detail to replicate the finish achieved by the factory. The 'peel' (textured look of the paint finish) can vary greatly between manufacturers and the paint technician will configure the equipment and technique to best replicate a matching finish. After all of that they allow the paint to bake in the bake oven for a short while to speed up the drying/chemical reaction to harden the paint finish. We use PPG Envirobase water-borne paint system which is an environmentally friendly alternative to solvent based paints.
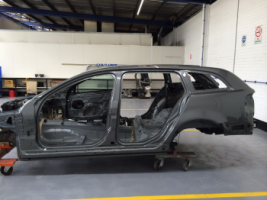
Step 11: Assembly & Inspection
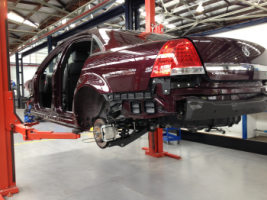
The Assembly technician plans the assembly approach to avoid incomplete parts of the assembly process. When the vehicle was disassembled the resulting parts were kept categorised for each component removed making the reassembly process smoother. Starting on the inner cabin areas the assembly technician will use a systematic method for installing the parts back on to the vehicle. Next comes mechanical components including the engine and associated parts. Then the outer components are installed and tested. After each part of the process is complete the assembly technician carefully check their work for fit, function and completeness. After all of the components are installed back on to the vehicle the assembly technician will complete a full check and test of everything on the vehicle. On large jobs like shown in this story, the vehicle will be road tested and a wheel alignment performed to ensure the vehicle drives perfectly.
Step 12: Detailing:
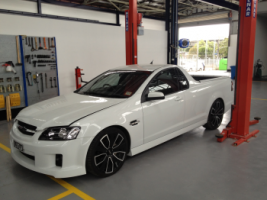
After the assembly technician is satisfied with their part of the repair process the car moves into detailing. If the workshop has performed their tasks in a clean and organised fashion the detailers jobs is to simply wash and clean the vehicle. They don't have to spend a long time cleaning mess made during the process. They can concentrate on presenting the vehicle at a level that exceeds the customers expectation. Cleaning will include the full inside and windows, outside, underside, door openings, engine bay and wheels. Your vehicle will be meticulously clean.
Conclusion:
This write up is about increasing the consumers awareness of the process undertaken by the highly skilled individuals who repair your car. A repair process like this can be a daunting prospect for a customer but with an understanding of our approach we hope to ease any worries or concerns people have about large structural repairs like this example. The result of a large structural repair done correctly is that your vehicle is re-engineered back to factory specification, not just repaired.


